Workshop or Kitchen Table? Choosing a Place to Make
Choosing a workshop or kitchen table starts with the work itself. Match tools, materials, storage and clearing-up needs to a space you can use reliably.
A workshop or kitchen table should be chosen around the work you need to do, not the image you have of a maker’s space. Before moving a bench or buying storage, list the tasks your small venture actually involves: cutting fabric, assembling paper goods, shaping clay, packing orders or something else. The right place is the one that lets those tasks begin, continue and stop without unnecessary friction.
A dedicated area keeps tools and materials close at hand, while a shared surface can make better use of a home that serves several purposes. Neither is automatically more productive. Work through the decision in order: identify the demands of your making, check the space available, plan storage and setup, then try a small routine before committing.
Start with the actions your work requires
Write down the making tasks in the order you perform them. Keep the list concrete. “Prepare fabric, cut pieces, stitch seams and press the finished item” is more useful than “make products”. Note which tools each task needs and whether materials must remain spread out between sessions.
Pay attention to the shape of the work. A compact task with a few hand tools may fit a kitchen table that is cleared after each session. A process involving several trays, a cutting mat and work left to dry may be easier in a dedicated area. Repeated measuring, cutting or assembly may also benefit from a surface that does not need to be reset every time.
Mark any space-sensitive requirements on your list. Does the task need a smooth, level surface? Do you need room to move around the work, or a chair positioned comfortably for detailed handwork? Will materials shed dust, leave residue or need time to set? Consider the actual activity rather than assuming that every kind of making needs a workshop.
Check whether a dedicated workshop fits the work
A workshop can be a separate room, a section of a garage or a clearly defined corner. Its main advantage is continuity: tools can stay arranged, partly finished work can remain in place, and setup may be simpler when you return. Shelving, labelled containers and a workbench can give each material a predictable home.
That continuity is useful when a task involves several stages or equipment that would be awkward to pack away. It is less helpful if the space is hard to reach, uncomfortable to work in or filled with supplies that rarely support current work. A dedicated area still needs a clear route, adequate lighting and storage that suits the tools, not merely a collection of boxes.
Make a simple floor plan before rearranging anything. Draw the door, windows, fixed storage and the work surface. Add the route you take to collect materials and remove finished pieces. Keep frequently used items within easy reach, while occasional supplies can go further away. Leave enough room to approach the work without moving unrelated objects each time.
Think about the boundary between making and the rest of the household. A separate room may help keep materials out of shared living areas, but only if it can be kept orderly and used at suitable times. In a shared garage or spare room, agree where tools and in-progress work may stay. When equipment or material handling raises a safety concern, follow the maker’s instructions and ask a qualified professional where appropriate.
Check whether a shared table can reset cleanly
A kitchen table or other shared surface can suit small, self-contained tasks. It avoids reserving a whole room and can keep making close to everyday household routines. The trade-off is that work has to be set up and cleared, so the table’s size is only part of the decision.
List everything that must move before and after a session: tools, stock, packaging, protective covering and work in progress. Decide where those items will go. A lidded box, shallow tray or cupboard shelf may hold a small kit; larger materials might need a separate storage spot. If completed pieces cannot be left on the table, identify a flat place where they can rest undisturbed.
Test the route from storage to the surface. If you have to carry loose tools through a busy room, simplify the kit or use a stable container. Check that the surface suits the task and can be protected without making the work awkward. Do not assume that a cloth or mat is appropriate for every material; use coverings and cleaning methods suited to the surface and materials involved.
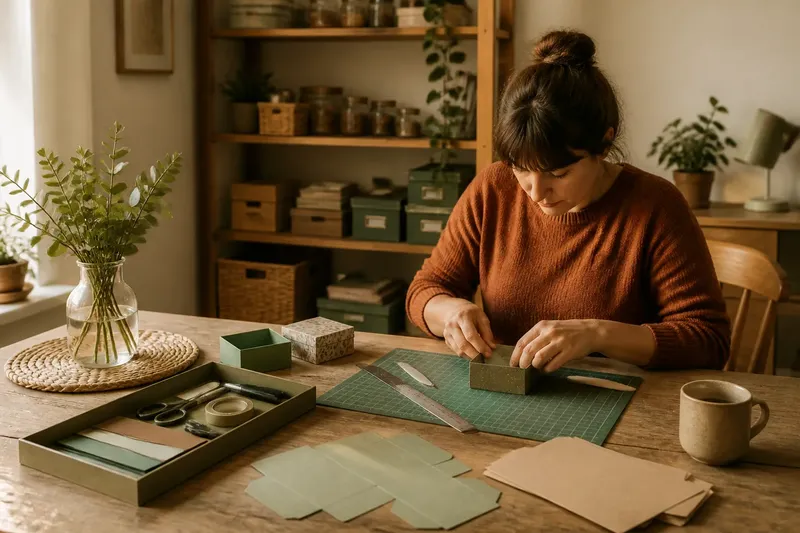
Imagine you make folded paper gift boxes in short sessions and share the dining table. You could keep a cutting mat, ruler, bone folder and card in one shallow tray, then set aside a shelf for flat pieces that need to stay uncreased. The expected observable result is a table that can be prepared and cleared with the same small set of actions, rather than a scattered collection of supplies.
Choose storage around the work sequence
Whether you use a workshop or a shared table, store things according to when you need them. Put the tools for the first task together, then keep materials for later stages separate enough to avoid mixing them. A labelled drawer, divided box or shelf can work; the useful feature is that you can identify and return items without searching through unrelated stock.
Separate current work from reserves. Keep the materials for the next planned batch accessible and store extra stock elsewhere. This helps a small work area remain usable without suggesting that every supply needs to sit beside the bench. For delicate or unfinished pieces, choose a container or shelf that protects them from being bent, knocked or covered by household items.
- Frequent hand tools: keep them in a tray or drawer beside the main surface.
- Materials for the current task: group them in a labelled container so they can be brought out together.
- Work in progress: assign a stable shelf, flat box or designated corner that others know not to disturb.
- Reserve supplies: store them away from the immediate work area and check what is on hand before preparing another session.
- Cleaning and finishing items: keep them together, with their use and storage arranged according to the product labels and manufacturer instructions.
In a workshop, storage can stay open if the room is used only for making and items are protected from dust or knocks. In a shared room, closed containers may make reset easier and keep supplies out of the way. Choose shelves, drawers or boxes for the materials you have, rather than buying a system before you know what needs to fit.
How do you decide between a workshop and a shared table?
Which kinds of making suit a shared table?
Compact work with a short, repeatable setup often suits a shared surface, especially when tools fit in one container and finished pieces can be stored elsewhere. Paper assembly, small mending jobs or simple handwork may be manageable this way. The deciding question is whether the task can pause and resume without leaving the surface occupied.
When does a dedicated work area make more sense?
A dedicated area becomes more useful when tools, materials or work in progress need to stay arranged between sessions. It can also help when the work sequence takes up a larger area than you can comfortably clear and reset. Check that the space is accessible and suited to the actual task before assigning it permanently.
What if neither option works as it is?
Try a hybrid arrangement: keep a compact kit in a cupboard and reserve one defined surface for making, while using a shelf or corner for work that must remain undisturbed. You might also dedicate a small bench to messy or longer-running tasks and use a shared table for clean finishing work. Keep the arrangement simple enough that you can explain where each tool and unfinished piece belongs.
How can you tell whether the space is too small?
Notice what interrupts a normal session: moving unrelated items, balancing materials on the edge, or repeatedly stopping to retrieve tools. If the task cannot be laid out without blocking access or putting work at risk, reduce the active kit, change the storage location or try another surface. The aim is a clear working area, not a room filled with equipment.
Try the arrangement before making it permanent
Use the proposed space for a few ordinary making sessions before adding furniture or buying containers. Start with existing items: a tray, a labelled box, a portable lamp or a folding surface, provided each suits the task. Notice where setup stalls and what has to be moved. Change one part of the arrangement at a time so you can tell which adjustment helps.
At the end of each session, make a brief note of what was easy to find, what had nowhere sensible to go and whether the work could be left safely in place. If clearing the table is the sticking point, simplify the kit or reserve storage nearby. If a workshop feels inconvenient, move the most-used tools closer to the entrance or reconsider whether a smaller, more accessible work area would serve better.
Choosing a workshop or kitchen table is less like choosing a label for your venture and more like arranging a drawer: the useful layout is the one that puts the things you reach for where the task needs them. Keep the decision open until you have seen how your materials, tools and work in progress behave in the space. Then make only the changes that remove a real interruption from your making routine.